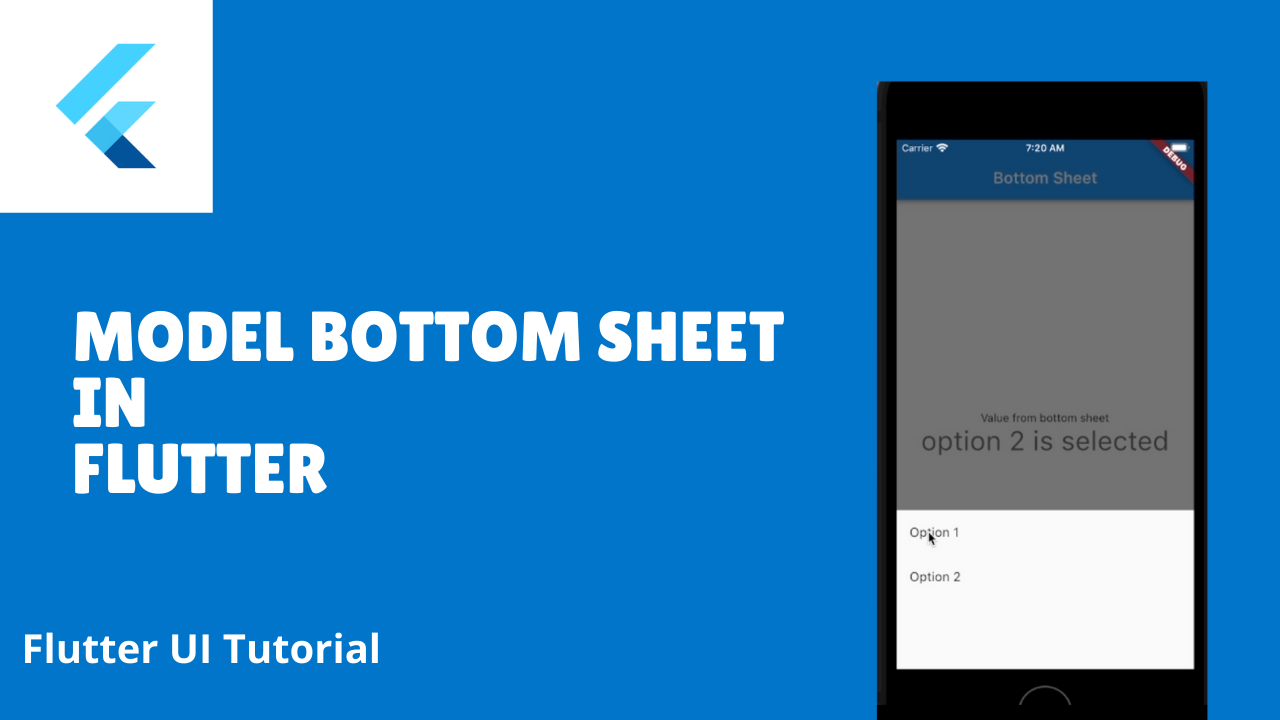
Hey, Flutter enthusiast. I Hope you all are doing well. In this blog i will show you how you can implement bottom sheet dialog in your Flutter Application?. Before Jumping right into code lets have some clarity what is bottom sheet? – Bottom sheet is one type of dialog which pops up from the bottom with some ui mainly some kind of selection.
You can read more about BottomSheet at Flutter BottomSheet
You can checkout this video for follow along tutorial.
Let’s start coding.

Step -1 Call method for BottomSheet
For showing bottom sheet dialog in your application you need to call or implement ‘showModalBottomSheet()’ method on button click. I have implemented bottom sheet view on floating action button click.
showModalBottomSheet() will require 2 parameters.
- BuildContext – context of current page / current widget / scaffold
- WidgetBuilder – builder function will return widget which we want to show in bottom sheet
here is sample code i wrote for this example :
showModalBottomSheet(
              context: context, //context of current scaffold
              builder: (context) { //builder will return ui to show inside
                return Container( //bottom sheet dialog
                  height: 200,
                  child: Column(
                    children: [
                      ListTile(
                        title: Text('Option 1'),
                        onTap: () {
                          Navigator.of(context).pop();
                          setState(() {
                            _selected = 'option 1 is selected';
                          });
                        },
                      ),
                      ListTile(
                        title: Text('Option 2'),
                        onTap: () {
                          Navigator.of(context).pop();

                          setState(() {
                            _selected = 'option 2 is selected';
                          });
                        },
                      )
                    ],
                  ),
                );
              });
Here as you can see i have created one BottomSheet with two ListTile. When someone clicks on any option (ListTile) is will show selected option in text widget. For closing Bottomsheet after selecting any option we just need to call
Navigator.of(context).pop(); //it will close the Bottomsheet and done you cool bottom sheet will appear on button or ui click with options and you can perform action as per user select any option from the bottom sheet dialog.
Here is Complete Source code :
import 'package:flutter/material.dart';

void main() {
  runApp(const MyApp());
}

class MyApp extends StatelessWidget {
  const MyApp({Key? key}) : super(key: key);

  // This widget is the root of your application.
  @override
  Widget build(BuildContext context) {
    return MaterialApp(
      title: 'Flutter Bottomsheet ex',
      theme: ThemeData(
        primarySwatch: Colors.blue,
      ),
      home: const MyHomePage(title: 'Bottom Sheet'),
    );
  }
}

class MyHomePage extends StatefulWidget {
  const MyHomePage({Key? key, required this.title}) : super(key: key);
  final String title;

  @override
  State<MyHomePage> createState() => _MyHomePageState();
}

class _MyHomePageState extends State<MyHomePage> {
  String _selected = '';

  @override
  Widget build(BuildContext context) {
    return Scaffold(
      appBar: AppBar(
        title: Text(widget.title),
      ),
      body: Center(
        child: Column(
          mainAxisAlignment: MainAxisAlignment.center,
          children: <Widget>[
            const Text('Value from bottom sheet'),
            Text(
              _selected,
              style: Theme.of(context).textTheme.headline4,
            ),
          ],
        ),
      ),
      floatingActionButton: FloatingActionButton(
        onPressed: () {
          showModalBottomSheet(
              context: context,
              builder: (context) {
                return Container(
                  height: 200,
                  child: Column(
                    children: [
                      ListTile(
                        title: Text('Option 1'),
                        onTap: () {
                          Navigator.of(context).pop();
                          setState(() {
                            _selected = 'option 1 is selected';
                          });
                        },
                      ),
                      ListTile(
                        title: Text('Option 2'),
                        onTap: () {
                          Navigator.of(context).pop();

                          setState(() {
                            _selected = 'option 2 is selected';
                          });
                        },
                      )
                    ],
                  ),
                );
              });
        },
        tooltip: 'Increment',
        child: const Icon(Icons.add),
      ), // This trailing comma makes auto-formatting nicer for build methods.
    );
  }
}
That is it for this blog i hope you enjoyed if you have any questions you can find me here